 Modern technology has stepped far forward. Therefore, representatives of new generations are already using other devices and assemblies that did not yet exist during the youth of their parents.
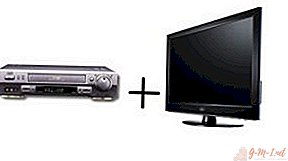
But there are memories that are stored only on old tapes. To revive these moments, you have to deal with a VCR. And some just like nostalgic and use old technology.
Therefore, the urgent question is: is it possible to connect an old cassette recorder to a modern new TV? How to do it right?
In this article, you will learn how to connect a VCR to a modern TV. We will also figure out how to prevent annoying mistakes during this procedure.
Basic connection methods
There are three connection methods, each of which has its own characteristics. They must be taken into account so as not to break the units. Knowing all the connection options will also help you choose the one that is ideal for your devices. The result of the process depends on this.
So, you can connect using:
- coaxial cable;
- SCART cable
- RCA cord;
Via coaxial cable
To connect using this method, you need a wire whose resistance is 75 ohms.
It is very important to be careful and clearly follow the algorithm of actions, which will be presented below. Because even the most insignificant, at first glance, error can lead to the fact that household appliances will not work. And it’s good if the VCR just doesn’t connect and you can try again. But it is highly likely that both devices will simply break. Then you have to call professionals who can fix them.
IMPORTANT! Before starting the procedure, be sure to disconnect the equipment from the electricity. Power surges can damage not only technology, but also you personally.
Now you can start the procedure in which there is nothing complicated.
- Need to insert one end of the cable into the connector on the old VCR, which can be called either RFOut or COAX Out.
- The other end is inserted into the receiver COAX In (RF / ANTIn).
- Thereafter you can connect the equipment to electricity and run.
You will also need to select some television channel through which the tape recording will start playing.
Using RCA cable
When using this method, please note that disconnecting the equipment from the network is extremely important. If this is not done, then all contacts will burn out, and you will be left with nothing.
The RCA cable is a wire with three multi-colored plugs: red, yellow and white. Be careful not to mix colors to avoid mistakes.
The yellow end connects to the VideoIn jack on the TVand the opposite end of the wire to the VideoOut socket. Note that manufacturers often make the connector shell in the same color as the plug that must be connected to it. But this is not an indisputable rule, sometimes there are inconsistencies. Therefore, it is better to play it safe and focus solely on the names located next to the nests.
The remaining plugs are connected in the same way. On the VCR, this is the VideoOut jack, and on the TV, Video1 / AudioIn.
When all these operations have been completed successfully, you need to check whether you connected everything correctly. If everything is in order, then you can connect the equipment to electricity and start it. On the TV, specify the desired operating mode: Video 1 or Input 1.
Now you can start recording. Work with the RCA cable is completed.
Via SCART connection
This method provides the best playback quality of both picture and sound.. If you compare it with previous results, the difference will be obvious.
Exactly such connectors are available on most modern TV models. Connection does not require additional skills or actions, so anyone who wants to look at the big screen on old recordings made on the camcorder and remember the old days can handle it.
If you have such a connector on the TV, you just need to insert the plugs into these jacks. They are marked with SCART, so finding them is not difficult. They are presented in horizontal form and are clearly visible on the body.
If there is no such input, then SCART-RCA can be used.. In this case, the wire will connect the SCART connector of the TV and the RCA output of the VCR. In order for the signal to be transmitted using S-Video, you need a SCART-S-Video-RCA cable.
The input on the RF / ANTIn VCR is for connecting an antenna. This will allow you to watch any movies and shows that you like on a larger screen, to learn news and other interesting information.
Connection Success Check
After connecting, be sure to check the connection. This will make sure that all actions were performed correctly. This will not require much effort, and the entire check does not take much time.
- If the procedure was performed using a coaxial wire, you need to turn on the VCRby first making sure that it is connected to electricity. If the job is successful, standby should turn on (usually a blue or black screen). Then you can turn on the recording. The channel will continue to broadcast normally as soon as the VCR is turned off.
IMPORTANT! Some models require manual switching, which is done by pressing the Source button on the remote control.
- The RCA cable method is even easier to verify. You just need to make sure that you are connected to electricity, using the same Source button, select the desired signal and look at the screen. It should be in standby mode.
- If you have chosen connection method using a SCART cable, then both devices will turn on simultaneously. You can also check the connection by clicking the Source button, which changes the source.
Possible difficulties and errors when connecting
Sometimes it happens that you follow all the points of the instruction, do everything correctly, but the result is still disappointing. Do not despair, because nSome problems can be completely resolved by yourself.. The main thing is to know why this is happening.
No signal
If the TV stubbornly does not see the VCR signal, the causes of the malfunction can be as follows:
- breakdown of plugs or connectors;
- wire damage;
- improper TV setting.
In the first two cases, it is enough to simply replace the faulty elements with new ones, and everything will return to normal.
If all else fails, all that remains is to turn to the specialists. You need to find those who perfectly know the device of each device and will help solve the problem in the shortest possible time.
TV channel overlay
It may be that the image is transmitted perfectly, but the sound is blocked by the voice acting of other TV channels. Probably, this trouble is easily eliminated by changing the position of the antenna.
In most cases, this problem is typical of earlier models. The antenna interferes with the signal transmission from the VCR, which occurs at very low frequencies.
Useful Tips
- Before starting a connection, it’s best study instructionsattached to each device. This will help to understand at least superficially the principle of work. Need also make sure they are both working. Otherwise, the connection will be pointless, and maybe dangerous.
- It is also important to prepare in advance the cables that you will use. After all, if already in the process of work it turns out that the wire is faulty or does not fit in any other parameters, it will be too late to change it.
- Do not forget about safety! Do not connect anything to the switched on device, this can lead to its breakdown and other irreversible consequences. Also, be careful when connecting! If this is your first time doing this, it’s very easy to mix up the inputs and insert something in the wrong direction.
Now you know how to connect a VCR to any TV and watch your favorite movies from cassettes or record any important points for you. The procedure is extremely simple, and if you be careful, even a person who is far from the secrets of technology will cope with the connection. The VCR now is a real rarity, which, nevertheless, is still used by lovers of nostalgia.
Leave Your Comment