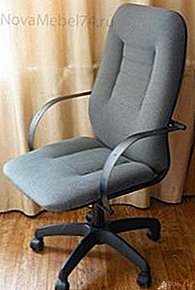
 Why do I need a computer chair? No, of course, at a computer, and even an interesting toy you can even sit on a stool. But a problem arises - after an hour the back becomes numb, the neck goes numb. Therefore, a person thinks about a computer chair, which will make life easier, will give comfortable conditions to hours of sitting.
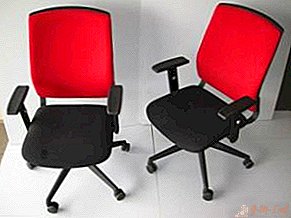
The manufacturer of office furniture, it would seem, took into account all the requirements of users - now you can find chairs for any wallet, style, size. But if your hands itch, the sea of free time, you have experience working with wood and metal, then we will tell you how to do everything yourself.
Indisputable advantages of "hand mei":
- You create a chair of your own unique design, ideally suited to the interior
- The chair fully meets your needs, the sizes are selected just for you
- Optimum materials are selected, the work is done for yourself, there is no point in saving
We divide the whole process into stages so that during the work we do not miss something important.
Preparatory stage
 It includes the following operations:
- Understand what you want to see in the end;
- Make measurements;
- Pick up and prepare tools and materials.
Now for each operation in more detail.
The parameters of a computer chair completely depend on your preferences, height, weight. The figure shows the dimensions of a standard chair for an adult. We will build on these sizes. If something does not suit you, then resize.
Preparation of tools and materials
ATTENTION! Although no sophisticated professional equipment is required, it is unlikely that everyone has everything on the farm. But you should not make expensive acquisitions - you can rent an instrument from friends, neighbors or a hardware store.
So you will need:
 Welding machine;
- Angle grinder (grinder);
- Drill with a set of drills, jigsaw;
- Furniture stapler with a set of staples;
- Screwdriver, bits, set of keys;
- Sandpaper, file;
- Scotch tape;
- Bolts, screws;
 Welding machine;
Materials
- Plywood sheet 10-15 mm thick;
- Metallic profile;
- Upholstery fabric, foam for the seat and back;
- Primer / varnish / paint;
- Swivel castors.
Manufacturing process
We start with the manufacture of backs and seats.
- We take a sheet of plywood, transfer the image of the back, seat, armrests. The shape, size and what will be the chair on which you plan to spend time in front of the computer, completely depend on your imagination. Consider your preferences, height, weight. Take standard sizes or design your own.
- Using a jigsaw, carefully cut out the parts along the contour, grind the edges, the surface with sandpaper. Give them smoothness, evenness.
- Preparing the base of the chair. The most important requirements for this part are reliability and stability. From what you plan to make the basis - like a regular chair with 4 legs or with one, but ending with a cross and wheels - the model will consist. If you plan to adhere to the classic form of a computer chair, then as a base, prepare a reliable steel pipe, channel, corner with wheels. But in this case it will not be possible to adjust the height of the product, immediately select the one you need. Do not forget about the wheels, their sizes should also be taken into account when calculating. Yes, it is impossible to raise or lower it, but its main advantage is absolute stability.
- We construct a back. Whether or not you can adjust the height is up to you. The part fixed in one position is made of a metal profile. We give it the shape of the letter "X" or the frame, then fasten it with welding or bolts to the base. Mobility is achieved by a hinged frame attached to the back of the bar with holes fixed to the seat bolts. So, we get on both sides at a certain angle there are fixing strips.
 A computer chair differs from an ordinary chair in one detail - the presence of armrests. Usually they are made in the form of the letter "P" - the upper one should be located so that the elbows lie comfortably on it, and the lower part of the "letter" is fixed to the base with welding or bolts. But this is usually - you are the chief designer, what form you choose, it will be so.
- Now the final stage. Directly assembling the chair. We grind the body parts, coat with a primer, paint. Let it dry completely. Then, on the bolts or screws, the armrests and the seat are fixed to the structure. We attach legs or a cross to the base. It can be made of different materials - metal, wood or plastic, but the basic requirement is for it - it must be durable and withstand the weight of the user.
 A computer chair differs from an ordinary chair in one detail - the presence of armrests. Usually they are made in the form of the letter "P" - the upper one should be located so that the elbows lie comfortably on it, and the lower part of the "letter" is fixed to the base with welding or bolts. But this is usually - you are the chief designer, what form you choose, it will be so.
ATTENTION! When calculating the height, do not forget to consider the height of the foam.
The wheels intended for the chair are mounted on the legs of the chair. On the seat, back, armrests with tape and ropes we fix the foam rubber. Try to evenly distribute the material on the surface of the parts. To add aesthetics, we stretch over a synthetic winterizer or upholstery dense fabric. We fix the fabric using a furniture stapler. Now the final smear - we cover all the "unsightly" parts of the product with a cloth. We measure the size of such parts, cut the fabric.
When we start to cut out the details, add a 2 cm allowance to each side. We apply the resulting cover so as to hide the stapler brackets, bend the edges.
Well, the main work is completed. A self-made computer chair is ready. A new piece of furniture will delight you for a long time. Now we are redecorating the rest of the workplace to match a new chair.
Leave Your Comment